It's finally time to paint your front door. Although this is a relatively simple task, you'll want to do it carefully. After all, your front door is going to be seen by everyone who passes by. So, we'll do our best to guide you on how you should paint your door properly.
We're making it easy for you because you won't be needing to remove your front door. You can leave it right where it is and follow the steps in this guide. Here are the steps you'll be taking:
- Gather the required tools
- Clean your front door thoroughly
- Prepare your door for painting
- Set up the painter’s tape
- Paint your door with consistency
- Seal your painted door and tidy up
Before we get into the steps in detail, there are some points you need to take note of. Be careful not to choose a rainy day to paint your door as it can ruin the results. Schedule a bright and sunny day to get the job done.
Choose a color wisely

Of course, before you decide to paint your front door, you'll need to decide on a color. Really take your time with this because you'll dread having to redo the process if you choose to change colors later on. It can also be difficult to paint over certain colors, so choose wisely.
If you plan on repainting your door using a completely different color, you'll need to use a separate primer. You'll also need to cover your entire door with the primer and allow it to dry before applying the new color. If you're repainting your door using a color in the same color family, you can use paint with primer already in it.
It's also important to note that the color of your door may appear differently depending on the time of day. Aim for a color you're satisfied with during the daytime.
A great piece of advice is going with a classic natural hue color such as black, gray, and navy blue to last a very long time. It is your door, however, so feel free to choose any color you like. Just note that other brighter and more vibrant colors tend to wear quickly.
Use the right paint
You can't just use any paint for your front door. When shopping for paint, check on the label to see if the cans are "exterior" or "interior/exterior." This step is crucial as these types of paint are designed for exterior use, such as your front door.
They're different from regular paint as exterior paint formulas are thicker, contain more pigments, resins, and resiliency additives. In other words, they're resistant to chipping, fading, peeling, and staining. Although exterior paint is more expensive, you'll save money and time in the long run from having to repaint your door more frequently.
Depending on the material of your front door, you need to choose the correct paint base, whether it be oil or water. Here are two easy guidelines to follow:
- Use water-based exterior paint for fiberglass doors and pine, white fir, and other wooden door types that don't bleed.
- Use oil-based exterior paint for metal doors and cedar, cypress, and other wooden door types that bleed.
Finally, we advise going for a semi-gloss finish as it's durable and reflective. It's heavily resistant to wear and stain and can easily be wiped down for cleaning. Without a doubt, using a semi-gloss finish will leave you with a stunning and shiny front door that's built to last.
Now that you know everything you need to get started, let's get to painting!
1. Gather the required tools

Here are all the tools you'll need to paint your front door:
- A quart of your exterior paint. For most standard-sized doors, a quart of paint will be enough. Have your entire paint bucket nearby in case you need more.
- A paintbrush and roller. A paintbrush alone can get the job done, but you can use a paint roller if you'd like.
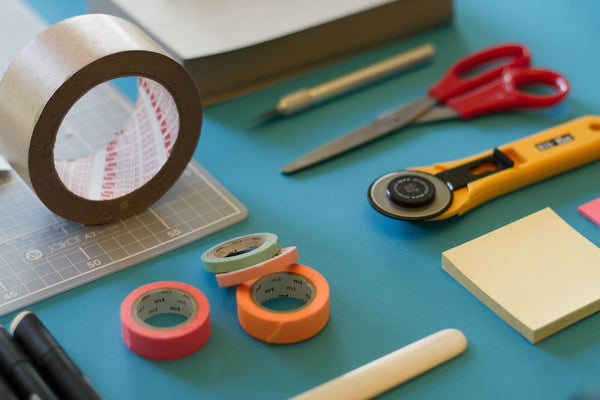
- Painter's tape and a cutting tool.
- Water-based polyacrylic or acrylic varnish protective sealer.
- A scraper.
- Fine or high grit sandpaper.
- Cleaning wipes.
- A wet rag or cloth.
- A dry cloth.
Once you’ve gathered all your tools, head on over to your front door.
2. Clean your front door thoroughly
Before you get started with anything, make sure the space around your door is nice and tidy. Have all your tools nearby and move anything that might get dirty away. It's a good idea to lay some newspaper on the ground to avoid making a mess from accidents and splashes.
Now, wipe down your entire front door using cleaning wipes to remove dirt and grime. Be thorough when cleaning to see the best results after you've finish painting. Be sure to get any crevices and hard-to-paint corners. If you don't do a thorough cleaning job, your paint finish won't look smooth, and the coating won’t last as long.
If you plan on replacing your door handle, you'll need to remove it and clean the surface underneath. Otherwise, clean around your current door handle. Once you wipe down your entire door, use a clean cloth to dry it down.
3. Prepare your door for painting

Once your door is nice and clean, it's time to prepare for painting. First, decide whether you need to strip your front door or not.
If your door is in good shape without any holes, dents, and dings and the finish is still smooth, then you probably don't need to strip your door. However, if you find that the current paint is chipping away and bubbly, then you likely need to strip your door.
If your door's current condition doesn't look great, don't get lazy and skip out on stripping it. You're already doing a paint job in the first place. Why not give your door a durable and long-lasting finish? If you do the job right, you won't have to retouch your door for years to come. For any holes in your door, fill them with wood putty.
Now, scrape off any part of your door that isn't smooth using your scraper. We're talking about any bits of loose flaking paint from the old finish.
Next, gently sand your entire door using fine or high grit sandpaper. The goal is to give your exterior paint a rough surface to grip, which will drastically improve the painting results, including the finish. When sanding, you should be thorough but not rough in removing any inconsistencies, scratches, and other imperfections.
Remember that you're not sanding your door for real. It's just to give the surface some tooth for the paint to grip. Once you're done sanding, use your wet cloth or rag to remove dust particles from the sanding. Apply a separate primer to your door if needed and allow it to dry for at least 45 minutes to an hour.
4. Set up the tape
Although some people prefer not using painter's tape, it's a good idea if you're not very stable with your hands. Grab your painter's tape and tape off all windows and hardware on your door (anything that isn't the door itself).
Ideally, you'll want to remove all your door hardware to do the paint job perfectly. Otherwise, you can leave the door hardware there and tape around it.
Taping works as a safety net to ensure you don't paint over something on your door by mistake. Although it's not a big deal since paint comes off easily on glass or metal, it just makes the job cleaner.
5. Paint your door with consistency

We're finally at the fun part, the actual painting!
Before you start painting, make sure your door is open so that it can dry properly. Place something heavy on the ground to avoid letting your door close during the entire time you're painting.
To start, add a thin coat of paint on a quality paintbrush or roller and begin painting. Paint carefully using nice and slow strokes. A paintbrush will be more convenient to cover the edges and corners of your door, along with other hard-to-paint areas. You can use a roller for the larger and flat surfaces of your door.
Always make sure you're painting in thin coats. Once you've finished the first coat of your door, wait until it dries to apply the next coat. You should be able to find the amount of time it takes for the paint to dry on the label of your can.
Regardless of the quality of paint and how you applied it, you'll find that at least two coats are mandatory. With only one coat, you'll find brush strokes and roller marks all over the place. The paint job never looks good enough after one coat, so don't skip out on the second one. Some people may even need to work on a third or fourth coat. It all depends on the quality of materials and work you did.
Once the last coat has dried and you see that your door is looking nice and clean, move on to the final step.
6. Seal your painted door and tidy up
The final step is really easy.
If you used semi-gloss finish paint as we recommended, seal your painted door using a water-based polyacrylic or acrylic varnish protective sealer. Sealing your door will give it a durable protective finish that'll leave it looking crystal clear and polished. If you used exterior grade latex paint, you don't need to steal your door.
Once you're done with that, you can get rid of all the painter's tape and newspapers on the ground if you used them. You'll need to wait until the last coat of paint, including the protective sealer, has completely dried before putting your door hardware back on.
That's all there is to it!
If you chose a nice and sunny day to work on this painting job, you could have it done in a few hours. We hope you enjoy your new and stunning door!


![SuperSocket & Ratchet Adapter Bundle [Limited Time Sale]](http://cdn.shopify.com/s/files/1/0457/1650/4740/products/10SocketBundle_4b6136be-c43b-4337-a556-d27ffddad9a5_160x.jpg?v=1637865366)


